Full disk encryption (FDE) ensures that all data on your disk is encrypted, requiring a passphrase or key file to unlock at boot. In this guide, we’ll cover how to set up FDE during installation and configure automatic unlocking using a secure key file. This setup works universally across popular distributions like Fedora and openSUSE, allowing for automated decryption during boot.
Part 1: Installing Linux with Full Disk Encryption
During installation, both Fedora and openSUSE offer an option to enable full disk encryption on the root partition. Here’s how to set it up.
Steps to Enable Full Disk Encryption
- Start the Installation Process
Boot from your installation media (USB or DVD) and start the installation. - Select Disk Configuration
During the disk partitioning step:
- Choose Custom Partitioning or Advanced Partitioning or Guided Setup to configure encryption manually.
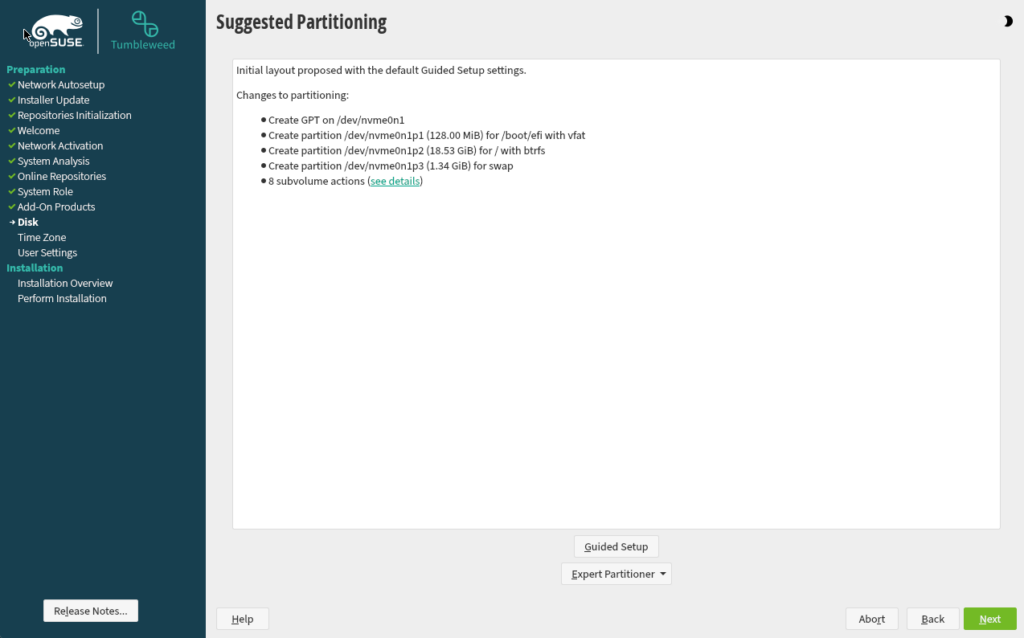
- Select your primary partitions (
/,/home, or any additional partitions), and enable the encryption option for each by checking the “Encrypt” or “Enable Disk Encryption” box.
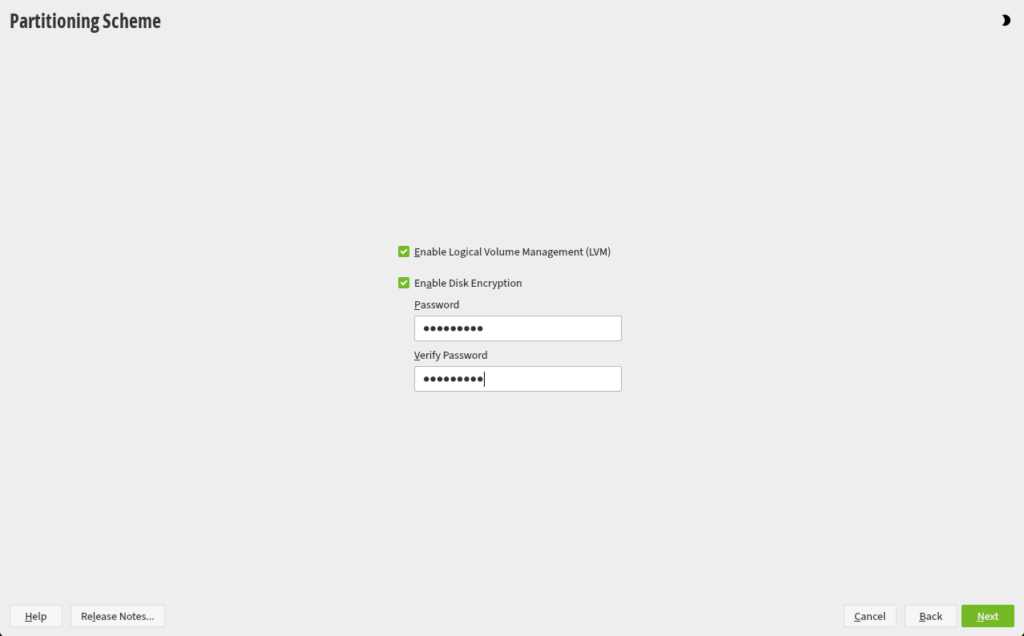
- Set Encryption Passphrase
When prompted, set a strong passphrase to protect your encrypted partitions. This passphrase is crucial, as it will be required to access your data unless configured for automatic unlocking. - Complete the Installation
Continue with the installation process. Once complete, the installer will automatically configure your system to require the encryption passphrase at each boot.
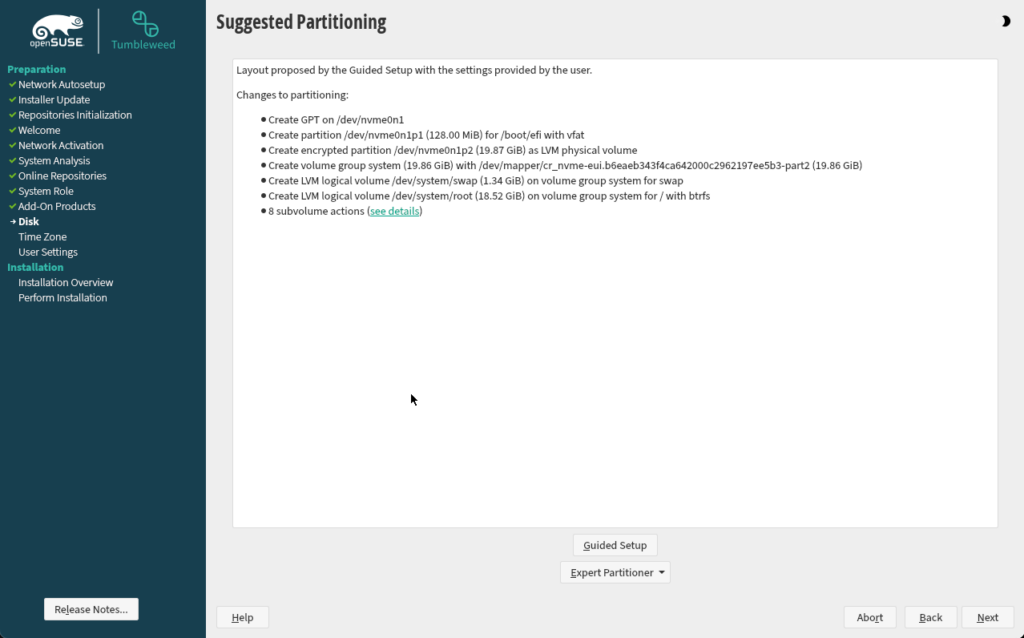
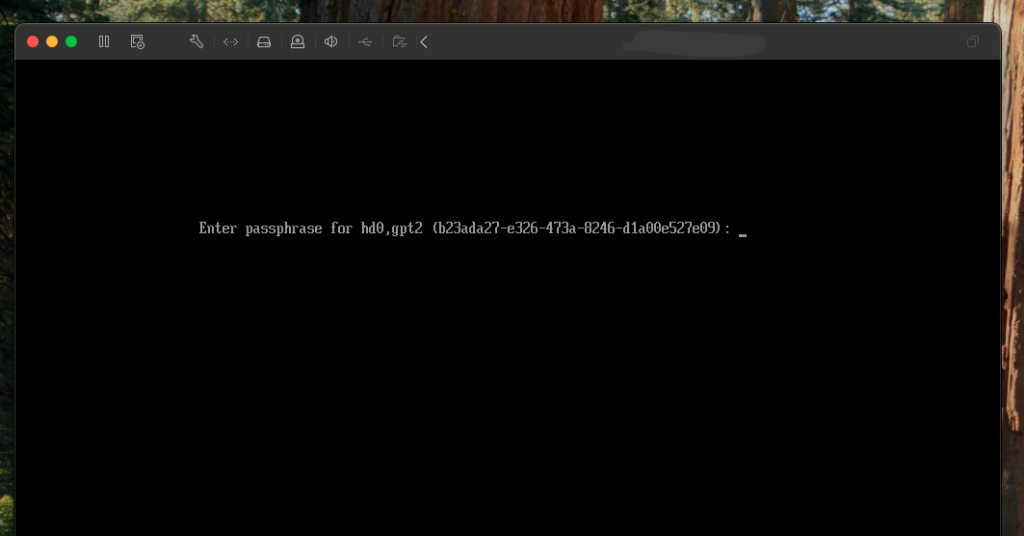
3. Enter password to boot the system
Restart the system after installation is finished, and you will be prompted to introduce your password to continue booting the system
Part 2: Configure Automatic Key Setup for FDE in the Initrd
Once your system is installed with FDE, you can set up an automatic key-based unlocking mechanism. This configuration eliminates the need for manual passphrase entry at boot by storing a secure key file in the Initrd image.
1. Identify Encrypted Partition Name
After installation, check your disk layout and encryption setup:
lsblkYou’ll see a structure similar to this:
NAME                                                    MAJ:MIN RM  SIZE RO TYPE  MOUNTPOINT
sda                                                       8:0    0   32G  0 disk
├─sda1                                                    8:1    0  512M  0 part  /boot/efi
└─sda2                                                    8:2    0 31.5G  0 part
  └─cr_scsi-0QEMU_QEMU_HARDDISK_drive-scsi0-0-0-0-part2 254:0    0 31.5G  0 crypt
    ├─system-root                                       254:1    0 29.5G  0 lvm   /
    └─system-swap                                       254:2    0    2G  0 lvm   [SWAP]
The NAME field (e.g., cr_scsi-0QEMU_QEMU_HARDDISK_drive-scsi0-0-0-0-part2) represents the LUKS name. We’ll use this NAME variable in the setup.
2. Create and Secure a Key File
- Create Key Directory
Set up a secure directory for the key file:
mkdir /etc/cryptsetup-keys.d
chmod 700 /etc/cryptsetup-keys.d- Generate the Key File
Useddto generate a random key file and secure it:
NAME='cr_scsi-0QEMU_QEMU_HARDDISK_drive-scsi0-0-0-0-part2'
dd if=/dev/random bs=256 count=1 of=/etc/cryptsetup-keys.d/$NAME.key
chmod 400 /etc/cryptsetup-keys.d/$NAME.key- Add the Key to LUKS
Associate the key file with your encrypted partition:
cryptsetup luksAddKey /dev/sda2 /etc/cryptsetup-keys.d/$NAME.key3. Configure Initrd to Include the Key File
Adding the key file to the Initrd image will make it available at boot, allowing for automatic unlocking.
- Add Key File to Initrd Configuration
Append the key file’s path todracut.conf:
echo 'install_items+=" /etc/cryptsetup-keys.d/* "' >> /etc/dracut.conf- Rebuild Initrd
Update the Initrd image with the new configuration:
dracut -f4. Update GRUB to Automatically Unlock the Encrypted Partition
- Update GRUB Configuration
Add the LUKS name to the GRUB configuration:
echo "GRUB_CMDLINE_LINUX+=\" rd.luks.name=$NAME\"" >> /etc/default/grub- Apply GRUB Changes
Update the GRUB configuration:
update-bootloader  # openSUSE
grub2-mkconfig -o /boot/grub2/grub.cfg  # Fedora and RHEL-based systems
5. Reboot and Verify Automatic Unlock
Reboot your system to test the configuration. The system should boot without requiring the encryption passphrase, relying instead on the key stored in Initrd.
Setting up full disk encryption during installation and configuring it for automatic unlocking provides a strong balance between security and convenience. With these steps, your system will boot securely, protecting your data without requiring manual passphrase entry.
