Helm provides a quick way of setting up a Redis cluster using a pre-made Helm chart.
1. Add the Helm repository containing the Redis chart you wish to install.I will use for this tutorial bitnami repo.
helm repo add bitnami https://charts.bitnami.com/bitnami2. Update local Helm repositories.
helm repo update3. Use helm install to install the chart. The basic command is as follows:
helm install my-release bitnami/redis4. Export the Redis password as an environment variable.
export REDIS_PASSWORD=$(kubectl get secret --namespace default redis-test -o jsonpath="{.data.redis-password}" | base64 --decode)You can check it then with echo $REDIS_PASSWORD
That’s all, helm chart installed, but all pods are in Pending status?
In my case there was no Persistent volumes created so I needed to create it manually.
Create file pv.yaml and paste the content below:
apiVersion: v1
kind: PersistentVolume
metadata:
  name: redis-data-redis-master0
spec:
  capacity:
    storage: 8Gi
  accessModes:
    - ReadWriteOnce
  hostPath:
    path: "/storage/data-master0"

---
apiVersion: v1
kind: PersistentVolume
metadata:
  name: redis-data-redis-replicas0
spec:
  capacity:
    storage: 8Gi
  accessModes:
    - ReadWriteOnce
  hostPath:
    path: "/storage/data-replicas0"
Now lets create persistent volume:
kubectl apply -f pv.yamlCreate and give necessary permissions to redis storage folder:
mkdir /storage
chown 10001:10001 /storage/
Wait a bit and check if everything is working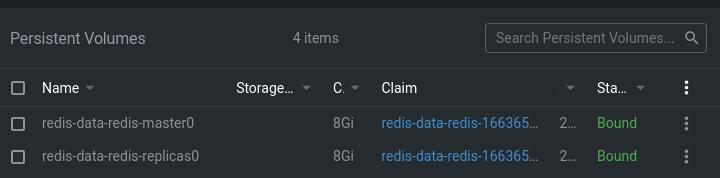
or with the command
kubectl get pv
**If you want to disable password authentication
helm upgrade redis-1669709819 bitnami/redis --set auth.enabled=falseAs a bonus let’s deploy Redis commander
redis commander is a redis web management tool written in node.js
Create redis-commander.yaml file and paste the content below:
---
apiVersion: apps/v1
kind: Deployment
metadata:
  name: redis-commander
  annotations:
    container.apparmor.security.beta.kubernetes.io/redis-commander: runtime/default
    container.security.alpha.kubernetes.io/redis-commander: runtime/default
spec:
  replicas: 1
  selector:
    matchLabels:
      app: redis-commander
  template:
    metadata:
      labels:
        app: redis-commander
        tier: backend
    spec:
      automountServiceAccountToken: false
      containers:
        - name: redis-commander
          image: rediscommander/redis-commander
          imagePullPolicy: Always
          env:
            - name: REDIS_HOST
              value: "redis-1669709819-master"
            - name: K8S_SIGTERM
              value: "1"
          ports:
            - name: redis-commander
              containerPort: 8081
          livenessProbe:
            httpGet:
              path: /favicon.png
              port: 8081
            initialDelaySeconds: 10
            timeoutSeconds: 5
          # adapt to your needs base on data stored inside redis (number of keys and size of biggest keys)
          # or comment out for less secure installation
          resources:
            limits:
              cpu: "500m"
              memory: "512M"
          securityContext:
            runAsNonRoot: true
            readOnlyRootFilesystem: false
            allowPrivilegeEscalation: false
            capabilities:
              drop:
                - ALL
---
apiVersion: v1
kind: Service
metadata:
  name: redis-commander
spec:
  ports:
    - port: 8081
      targetPort: 8081
      name: redis-commander
      protocol: TCP
  selector:
    app: redis-commander
  type: LoadBalancer
Now create deployment
kubectl apply -f redis-commander.yamlNow you can access redis commander on port 8081