A way to get your code deployed to the production server
Webhook allows to automatically retrieve the newest code any time a push is performed to the repo
Start with GitHub
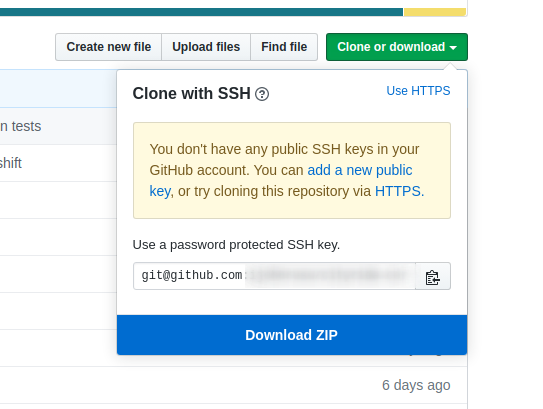
If you have an existing repo that you want to use then, great! You can take note of the SSH URI and you’re good to go. If you haven’t, create a new repository and copy down the SSH URI.
Installing Webhook
*Take notice, you may probably will need to install and Go.
Before we dive in, let’s start by doing a quick update and upgrade since we have a fresh Ubuntu 16.04 installation.
sudo apt update -y && sudo apt upgrade -y
sudo apt install webhook
Now that Webhook is installed, we need to create the directory structure and files for configuration, routing, and deployment script(s).
mkdir ~/webhooks
mkdir ~/webhooks/project-site
touch ~/webhooks/hooks.json
touch ~/webhooks/project-site/deploy.sh
chmod +x ~/webhooks/project-site/deploy.sh
The file hooks.json is going to hold our configuration and routing, while deploy.sh will be our bash script to execute the commands necessary to update from GitHub.
First, set up hooks.json by opening and editing the file. This file is the configuration for endpoints that will be created when we run Webhook. The file is an array of objects where each object is a unique endpoint.
Do not forget to change secret parameter, it’s your password.
[{
"id": "project-site",
"execute-command": "/root/webhooks/project-site/deploy.sh",
"command-working-directory": "/root/deployed-project/",
"response-message": "Executing deploy script...",
"trigger-rule": {
"match": {
"type": "payload-hash-sha1",
"secret": "PASSWORD",
"parameter": {
"source": "header",
"name": "X-Hub-Signature"
}
}
}
}]
Now lets edit bash script deploy.sh which we created previously.
Just paste the following code below:
#!/bin/bash

git fetch --all
git checkout --force "origin/master"
That’s it. We’ve installed Webhook, set up the configuration in hooks.json and written our deployment script, which changes to the designated directory and pulls the master branch from our soon-to-be GitHub repo.
Finally, let’s fire up Webhook by typing the following after replacing 0.0.0.0 with the actual public IP address of your server. And check your webhook directory.
whereis webhook
/usr/bin/webhook -hooks /root/webhooks/hooks.json -ip "0.0.0.0" -verbose
You’ll notice that the output states serving hooks on… then prints a URL with {id} at the end. That would be the id from object we created in hooks.json file: project-site.
Run nestat to check if everything is ok
netstat -peanut*I had a strange problem with binding ip address and ports. Webhook was binding at the tcp6 interface. Disabling didn’t help, so I made a small workaround script and put it in crontab to execute on reboot (@reboot):
touch webhookkiller.sh
chmod +x webhookkiller.sh
#!/bin/bash
killall webhook
/usr/bin/webhook -hooks /root/webhooks/hooks.json -ip "0.0.0.0" -verboseSetting up Git
We’re not done with our server quite yet. Open another terminal window and authenticate back into our server, since our first one window is running Webhook now.
Move to the working directory defined in hooks.json ,in our case it’s /root/deployed-project/ and type the following replacing your unique repo URI for mine after origin:
mkdir /root/deployed-project
cd /root/deployed-project
git init
git remote add origin git@github.com:username/project-site.git
Our final step on the server is to generate an SSH key-pair to be used when connecting to GitHub. In the Terminal window type ssh-keygen and confirm through the prompts by pressing ENTER until your keys are generated. Print out the public key by typing cat ~/.ssh/id_rsa.pub and copy the printed key which should look something like this:
ssh-rsa AAAAB3NzaC1yc2EAAAADAQABAAABAQCyzJrPVOJqsTqD2R3xirTp3VNMwpmJMyLklzJg4sRQyslTUmbNNmDVO573EbXQQf2PqPQljqKDFSKJODSFJDKLSFJS KLJJQLKJDLASKDLSKSDFSMjzl1FXF1wOGTXqcC4TvGBS1bFyUY5n8wSOJ8ntZ6bBNv0zA2t7X1vH8ahIBJLKCayq9ipobKlHPYqxBt6zAoeh/ILQ0PWhGkmbGqqzqN1jcVWOefLgj4Dl8bZWORS1nkqrVg2wFC2nnibH97kZLsNrdQaeK8jUrkUWkJcUELI02mkkqh2RtBx9EwQEvsm9YuDBD9xF+HyuWoAeqcKerb root@serverNow all that’s left is to configure our GitHub repo and test our deployment.
Configure Deployment Key and Webhooks (GitHub)
In your browser, go to the Settings for your repo by clicking on the gear icon. We’ll be setting up a Deployment Key first, so click there.
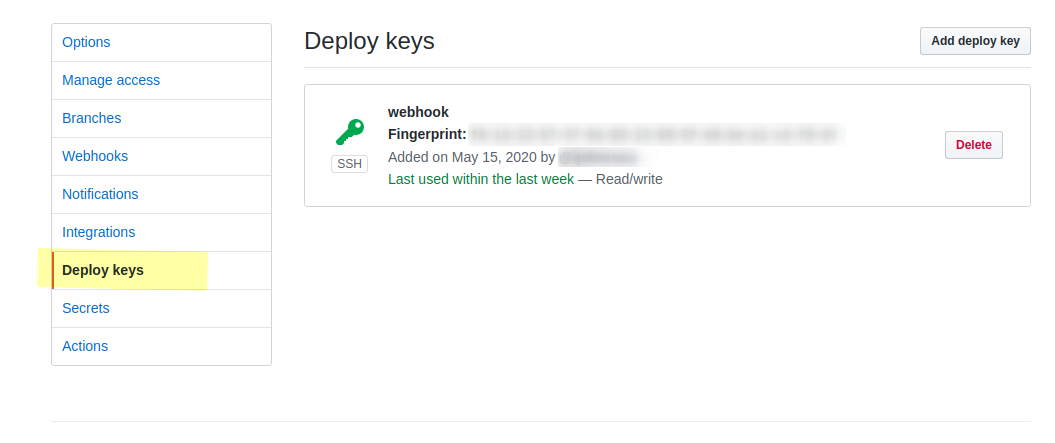
When you add the key, give it a name and paste in the printed key from above. GitHub only allows you to use a public key in one place, so if you have multiple sites to deploy to the same server, you’ll need multiple keys. Once the key has been made, go to the Webhooks section.
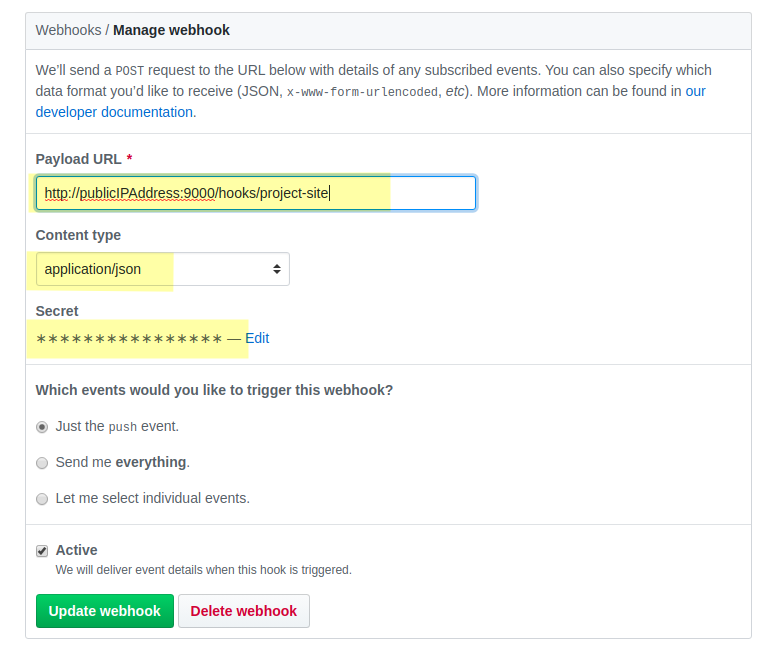
When you create the webhook you should see a check mark below the settings, meaning the server was successfully reached. Check your terminal running Webhook — you should see that the repo was fetched.

That’s it! To fully test the workflow, clone the repo to your local machine, if you haven’t already, and push a change to the master branch — you should see the change in your server as well.