Immutable systems, such as Fedora CoreOS, are designed for minimal changes and higher reliability. Fedora CoreOS is a Linux distribution optimized for containerized workloads, providing an immutable and minimal operating system for secure and scalable deployments.
In this post, we’ll walk through setting up Fedora CoreOS, configuring an SSH key, installing necessary tools like Butane, and setting up a Kubernetes cluster with CRI-O as the container runtime.
Generating an SSH Key
First, generate an SSH key to access your Fedora CoreOS system.
ssh-keygen -t rsaYou will be prompted to save the key in a file. The output will look like this:
Enter file in which to save the key (/home/user/.ssh/id_rsa):
Your identification has been saved in /home/user/.ssh/id_rsa.
Your public key has been saved in /home/user/.ssh/id_rsa.pub.
The key fingerprint is:
476:b2:a8:7f:08:b4:c0:af:81:25:7e:21:48:01:0e:98 user@localhost

The key's randomart image is:

+--[ RSA 2048]----+
|+.o.             |
|ooE              |
|oo               |
|o.+..            |
|.+.+..  S .      |
|....+  o +       |
|  .o ....        |
|  .  .. .        |
|    ....         |
+-----------------+
You can view your public key with:
cat ~/.ssh/id_rsa.pubInstalling Butane
Butane converts human-readable Butane Configs into machine-readable Ignition Configs. Install Butane using the appropriate method for your operating system:
On Fedora:
sudo dnf install -y butaneOn macOS via Homebrew:
brew install butaneOn macOS via MacPorts:
sudo port install butaneOn Windows via Scoop:
scoop bucket add extras
scoop install butane
On Windows via winget:
winget install --id Fedora.CoreOS.butaneCreating the Butane Config
Create a Butane config file named config.bu and replace the SSH key with your own:
variant: fcos
version: 1.5.0
passwd:
  users:
    - name: core
      ssh_authorized_keys:
        - ssh-rsa AAAAB3NzaC1......
Convert this Butane config into an Ignition config:
butane --pretty --strict config.bu > config.ignThe resulting config.ign will look like this:
{
  "ignition": {
    "version": "3.4.0"
  },
  "passwd": {
    "users": [
      {
        "name": "core",
        "sshAuthorizedKeys": [
          "ssh-rsa AAAAB3NzaC1yc2EAAAA....."
        ]
      }
    ]
  }
}
Installing Fedora CoreOS on VMware ESXi
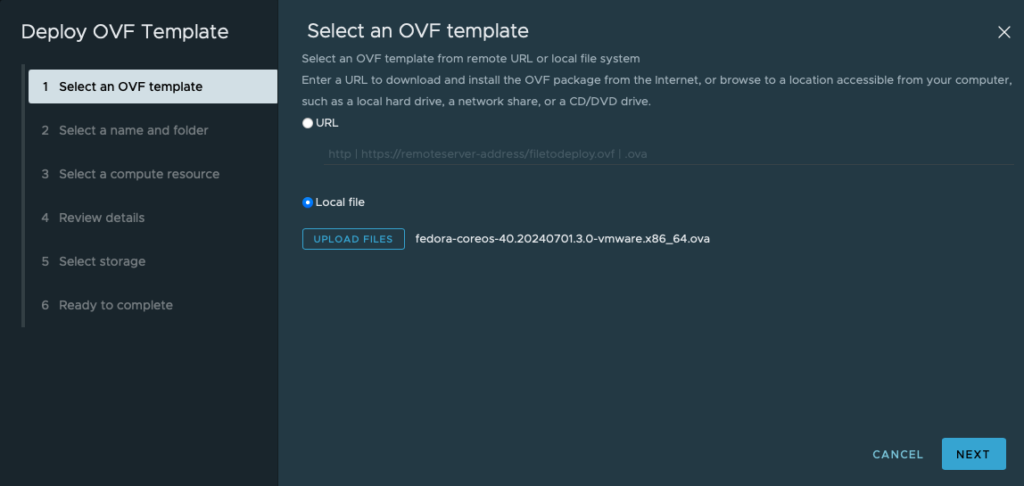
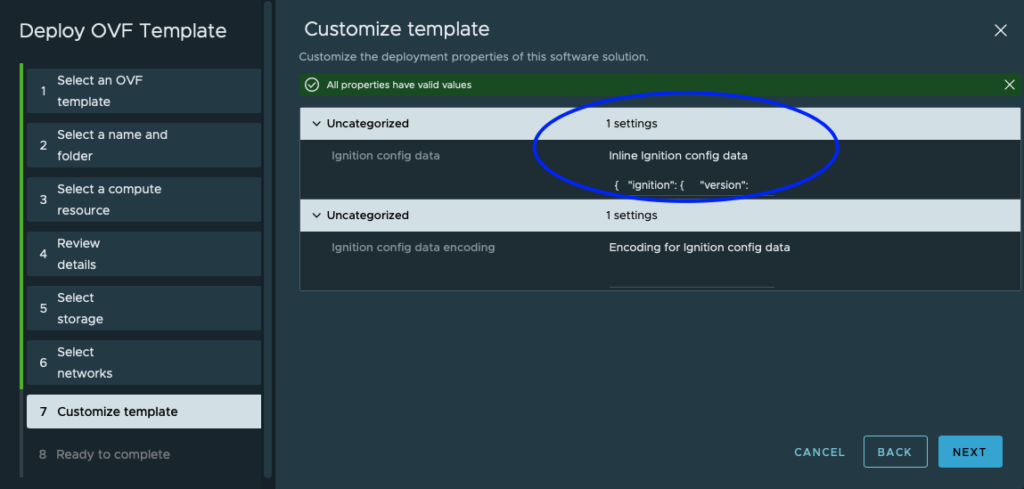
Deploy OVF Template: Choose “Deploy OVF Template” and select your downloaded template or download via URL.
Set Name and Folder: Name your VM and select a folder.
Select Compute Resource: Choose your compute resource.
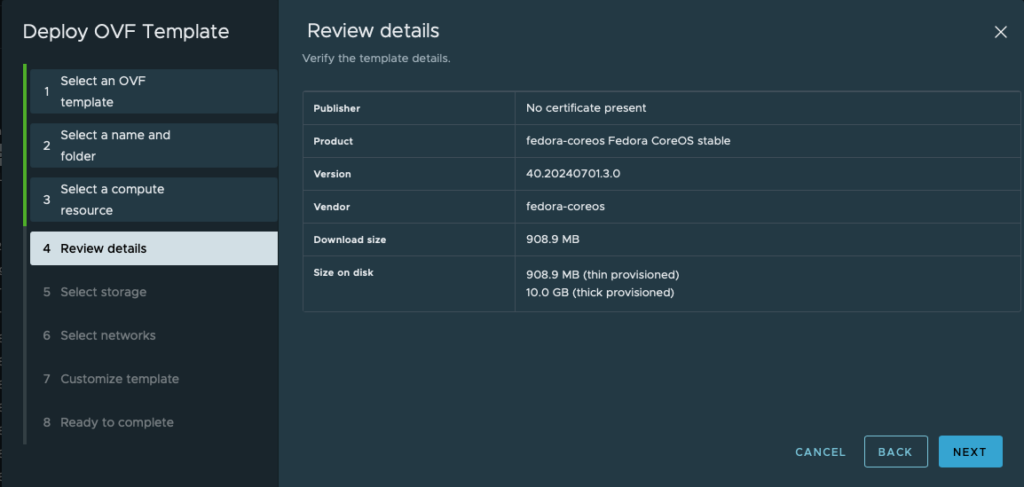
Review Details: Review the details of your deployment.
Select Storage: Choose your storage option.
Select Networks: Configure your network settings.
Customize Template: Paste the content of config.ign into the “Inline Ignition config data” field.
Complete Installation: Press “Finish” to start the installation. Once complete, the screen will show something similar to this:

You can log in to the new system using:
ssh core@ip_addressInstalling CRI-O and Configuring the Network
Install CRI-O and additional tools:
rpm-ostree install cri-o open-vm-tools htopReboot to ensure the packages are loaded:
systemctl rebootLoad necessary kernel modules:
cat <<EOF > /etc/modules-load.d/crio-net.conf
overlay
br_netfilter
EOF
Set up network settings:
cat <<EOF > /etc/sysctl.d/99-kubernetes-cri.conf
net.bridge.bridge-nf-call-iptables  = 1
net.ipv4.ip_forward                 = 1
net.bridge.bridge-nf-call-ip6tables = 1
EOF

sysctl --system
Installing Kubernetes Tools
Configure the Kubernetes repository:
cat <<EOF | sudo tee /etc/yum.repos.d/kubernetes.repo
[kubernetes]
name=Kubernetes
baseurl=https://pkgs.k8s.io/core:/stable:/v1.30/rpm/
enabled=1
gpgcheck=1
gpgkey=https://pkgs.k8s.io/core:/stable:/v1.30/rpm/repodata/repomd.xml.key
EOF
Install Kubernetes tools on the control plane node:
rpm-ostree install kubelet kubeadm kubectlReboot and set SELinux to permissive mode:
systemctl reboot
setenforce 0
sed -i 's/^SELINUX=enforcing$/SELINUX=permissive/' /etc/selinux/config
Enable and start CRI-O and kubelet:
systemctl enable --now cri-o
systemctl enable --now kubelet
Set the correct cgroup driver for kubelet:
echo "KUBELET_EXTRA_ARGS=--cgroup-driver=systemd" | tee /etc/sysconfig/kubeletCreating the Kubernetes Cluster
Create a clusterconfig.yml file on the control plane:
apiVersion: kubeadm.k8s.io/v1beta3
kind: ClusterConfiguration
kubernetesVersion: v1.30.0
controllerManager:
  extraArgs:
    flex-volume-plugin-dir: "/etc/kubernetes/kubelet-plugins/volume/exec"
networking:
  podSubnet: 10.244.0.0/16
---
apiVersion: kubeadm.k8s.io/v1beta3
kind: InitConfiguration
Initialize the cluster:
kubeadm init --config clusterconfig.ymlConfigure kubectl on the control plane:
mkdir -p $HOME/.kube
sudo cp -i /etc/kubernetes/admin.conf $HOME/.kube/config
sudo chown $(id -u):$(id -g) $HOME/.kube/config
Set up pod networking with kube-router:
kubectl apply -f https://raw.githubusercontent.com/cloudnativelabs/kube-router/master/daemonset/kubeadm-kuberouter.yamlAdding Worker Nodes
On worker nodes, install CRI-O, kubelet, and kubeadm:
sudo rpm-ostree install kubelet kubeadm cri-o
sudo systemctl enable --now crio kubelet
Change the hostname:
vi /etc/hostname # Add your hostnameJoin the worker nodes to the cluster using the join command from the control plane. If lost, generate it with:
kubeadm token create --print-join-commandDeploying Metrics Server
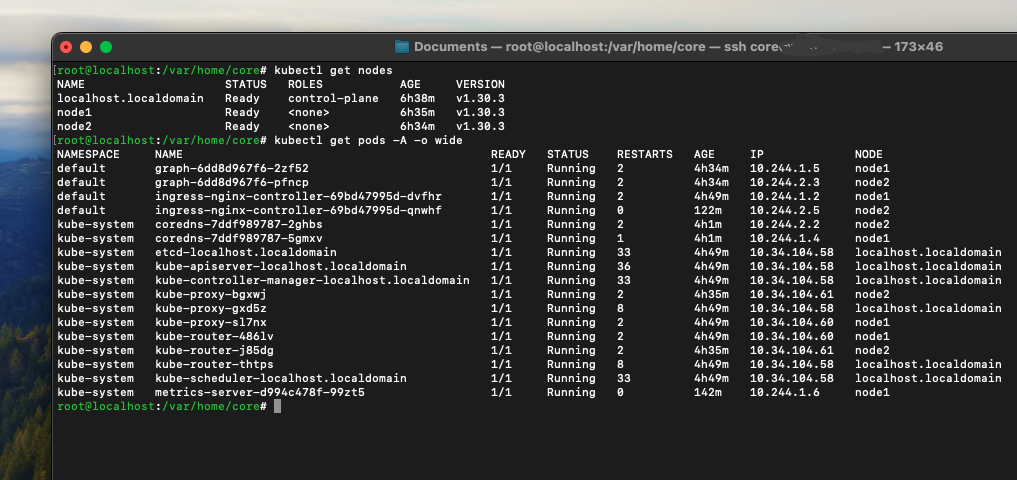
To test the cluster, deploy the metrics server:
kubectl apply -f https://github.com/kubernetes-sigs/metrics-server/releases/latest/download/components.yamlYou should see the metrics server deployed on node1 as intended.

Allowing Master Node to Schedule Pods
To allow the master node to schedule pods (which is disabled by default for security reasons):
kubectl describe nodes | grep -i taintskubectl taint nodes --all node-role.kubernetes.io/control-plane-To disable scheduling on control plane or any other node
kubectl taint nodes --all node-role.kubernetes.io/control-plane:NoScheduleAnd there you have it—a fully configured Kubernetes cluster on Fedora CoreOS with CRI-O!